Showing posts with label Brookside. Show all posts

Monday, March 9, 2015

Brookside Master Bedroom Plans


Now that we have doors to our Master Bedroom, it is a little bit easier to envision the space. We have already purchased the upholstered bed and the bedside tables. We have also painted the walls Sherwin Williams Anonymous. I am still debating on the color, but for now we are sticking with it. Here is a look at the other "base layers" (and sources) I have picked for our room:

1// Upholstered Bed. We were so excited to have a big master bedroom that we splurged on this gorgeous bed from Mitchell Gold Bob Williams right when we moved into our new home. We love having a king size bed and it makes for a great focal point in our large space.

2// Moroccan Souk Rug. This rug is ultra plush and will be great to put my feet on first thing in the morning. I have wanted this rug for like ever and now have the perfect spot for it. I also really like the geometric pattern and ethnic feel the rug gives the room. There are lots of places to buy souk rugs, but we are digging this one.

3// Semi Flush Fixtures. Our current lighting situation is an interesting one. Currently, there  are 4 sconces and 2 ceiling fans. The ceiling fans have no lighting so we are left with dim sconce light and the light from our current bedside table lamps (which I might add we are down to one table lamp after a certain kitty knocked one over). All that to say, our lighting situation is looking dim (hah!). We are currently on the hunt for fixtures similar to the ones shown. We need three light fixtures in a slightly larger size to provide adequate overhead lighting.

4//Ikea Trysil 3-Drawer Dressers. We stumbled on these during our last trip to IKEA. We really liked this option (and this one), but the price point was really eating into our budget. We decided to go for the low cost option (the look for less if you will). We like the metal legs, the clean lines, and the wood finish. We also found this Trysil Ikea Hack that we thought was a super creative way to add some brass to the look.

5// Fiddle Leaf Fig. The perfect way to add modern greenery to a room. I am still debating on buying a real or faux plant. My track record for keeping indoor plants alive is not so hot. Have any of you bought a fiddle leaf fig? What was the upkeep like? Easy to maintain? 

More to come as we pick out bedding, chairs, upholstery, pillows and lamps to complete the look of the master. What type of bedding and decor would you choose to go with this current look?


Monday, March 2, 2015

How To Prime & Paint Solid Wood Doors {and a FREE Printable!!}


Don't forget to look for the free HOW TO Printable at the end!

When we made our big to do list, we talked about adding doors to our Master Bedroom. (Yes, we bought a house without doors to our bedroom). I laugh because it has been 3 months and Ty and I have gotten use to having entire conversations from the living room to our bedroom with no problem. We are excited to have some privacy when guests come, and to stop tip toeing around in the morning when one of us gets up before the other. Because of the archway, these doors needed to be custom so we contacted a contractor in our area and had him come out to measure and create a template for the doors. 6 weeks later they arrived at our home to be installed. Our next step is to paint the doors. We did a similar door painting project on an exterior door in our last house, but this one is much easier since we have a fresh slab of wood rather than a door caked in years of paint. Here is how we painted our solid wood doors (and how you can do it too!).

How To Paint Solid Wood Doors

1// Remove door from frame. Remove all door hardware including hinges. This will give you a clear surface to paint and keep your hardware paint-free!

2// Lay your doors flat! This is key in avoiding drip marks during the painting process and while the doors dry.


3// Gather your supplies. We found that a foam roller brush gives the smoothest finish on doors and cabinets.You will also need a primer made for bare wood if your doors did not come primed. We chose Valspar bare wood. You will also need a foam sander block. This is essential for sanding between coats of primer. Depending on the finish of your doors you will need fine or a moderate grit sanding block. We bought both just in case. These are great for other sanding projects around the house too. Lastly, you will need a tack cloth to clean off the sanding debris, and your choice of paint for the door


4// Time to prime. Our doors were sanded well and smooth from the beginning so we did not sand prior to our first coat of primer. If your doors are uneven or have layers of paint, you will want to thoroughly sand them prior to priming. Using our foam roller we applied one coat of primer to each door and allowed it to dry for 2 hours  per the directions on the primer can.


5// Now that the primer is dried, its time to sand. We lightly sanded each door until the surface was smooth. Using a tack cloth, we then wiped the door of all sanding debris. This part is essential to keeping debris out of your paint and off of your roller.

6// (Optional) Depending on how well your primer went on and how porous your wood surface is, you may or may not want to coat with a second layer of primer. If so, repeat steps #4 & #5. We opted to move forward with painting at this point rather than a second coat of primer.

7// With the surface clean and dry, its time to paint. We really like Sherwin Williams ProClassic paint for trim and doors in our last house, so we went with it again. We also chose a semi-gloss finish in a custom white for the door. Using our foam rollers again, we rolled one coat of paint on to the door surface and allowed it to dry for 45 minutes.

8// Repeat step #7 until you have achieved an even coat throughout. We did three coats of paint total.

9// Once paint is completely dry, flip the doors and repeat steps 4-8.

10// Rehang newly painted doors. Replace hardware and hinges. Enjoy your newly painted wood doors!  (Before & After of our newly finished doors coming soon!)

Enjoy this FREE Printable:


Monday, January 5, 2015

Gallery Wall Love


I love a good gallery wall. I think they are eye-catching, warm and they just about make me swoon. I love how no two gallery walls are alike, and somehow even the order of the pictures says something about the person who lives in the home they dwell. The great thing about a gallery wall is that it is created over time. You don't have to have a ton of frames to start, and if the space allows, you can continually add to your collection - an ever growing art piece.


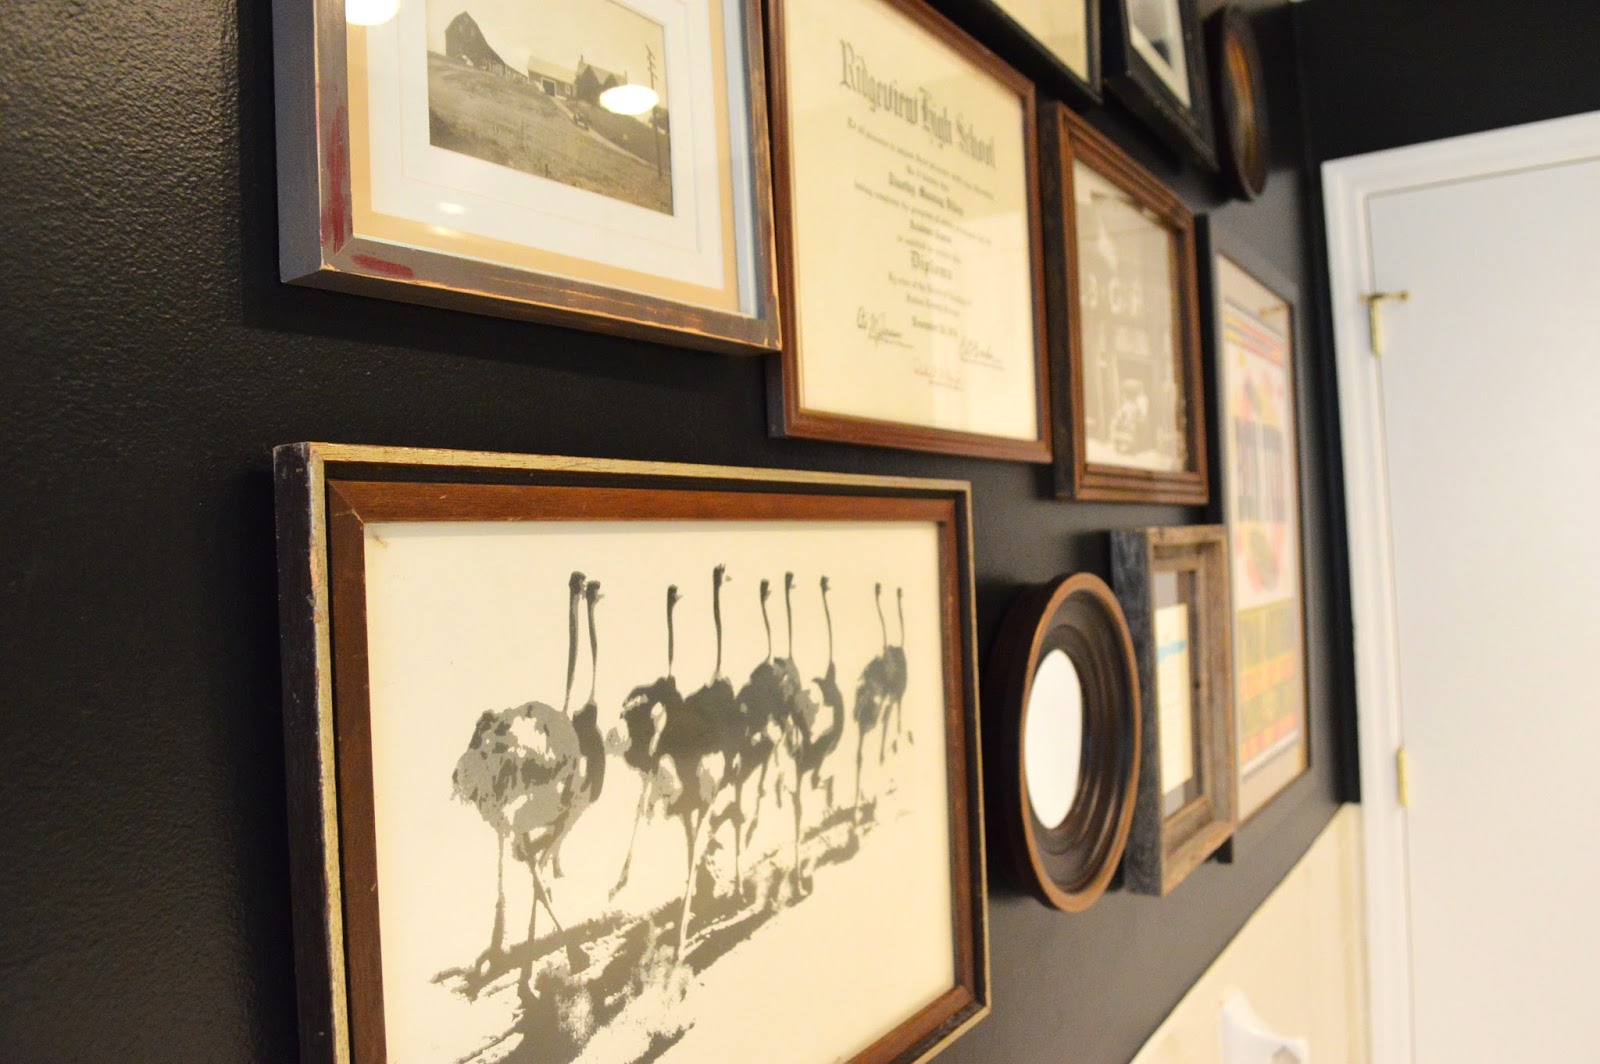
We have a collection of frames we melded together in our last house and I have been dying to hang them in our new house. I love reworking old things to fit into a new space. Originally, I had thought of designing a gallery wall around a TV, but as I stared at the blank black canvas of our guest bathroom, I just couldn't resist. Here is how we created an eye catching gallery wall in our guest bathroom (swoon.)


So where do you start? I asked a gal at West Elm who styles the store how she created their amazing gallery walls. Her take: Pick the biggest piece of art and hang it. Grow everything around that one piece. She doesn't measure, she just feels out the wall, the look and the space. And the results are amazing. I think this is great advice for you free-spirited individuals but for my type A self, this was a recipe for disaster (or at least a lot of extra holes in the wall). I compromised with kraft paper and some painter's tape.  


I traced each piece of art on the kraft paper and then cut out the tracing. I also penciled in which piece of art was which on the paper because many of the frames were similar sizes. Then, using painter's tape so that I wouldn't damage the fresh paint (FYI this black paint is SW's Tricorn Black and it is uh-mazing) I placed the largest art first and started placing and rearranging each piece of art until I found the perfect spot for each one. BOOM! Gallery wall magic.


The kraft paper also makes the hanging portion a breeze. Just measure the location of the hanging device on your picture frame and mark it on the kraft paper. Nail through that spot on the kraft paper and then tear the paper off the wall from around the nail. Fool Proof Gallery Wall Hanging in Minutes!


I love how the gallery wall turned out. It has been a great addition to turning the brown grout white and painting the walls black. I keep wandering back to the bathroom just to stare at it. This bathroom has come a long way and I am so amazed by the impact this easy-peesy gallery wall had on the space. Can you believe this is the same room?


If you are looking for a unique way to display your art collection, this is it! There is no right or wrong way to do a gallery wall - its all up to what you like. Share your gallery wall love in the comments section below!


Thursday, December 18, 2014

Bookshelf Styling Tips & Tricks


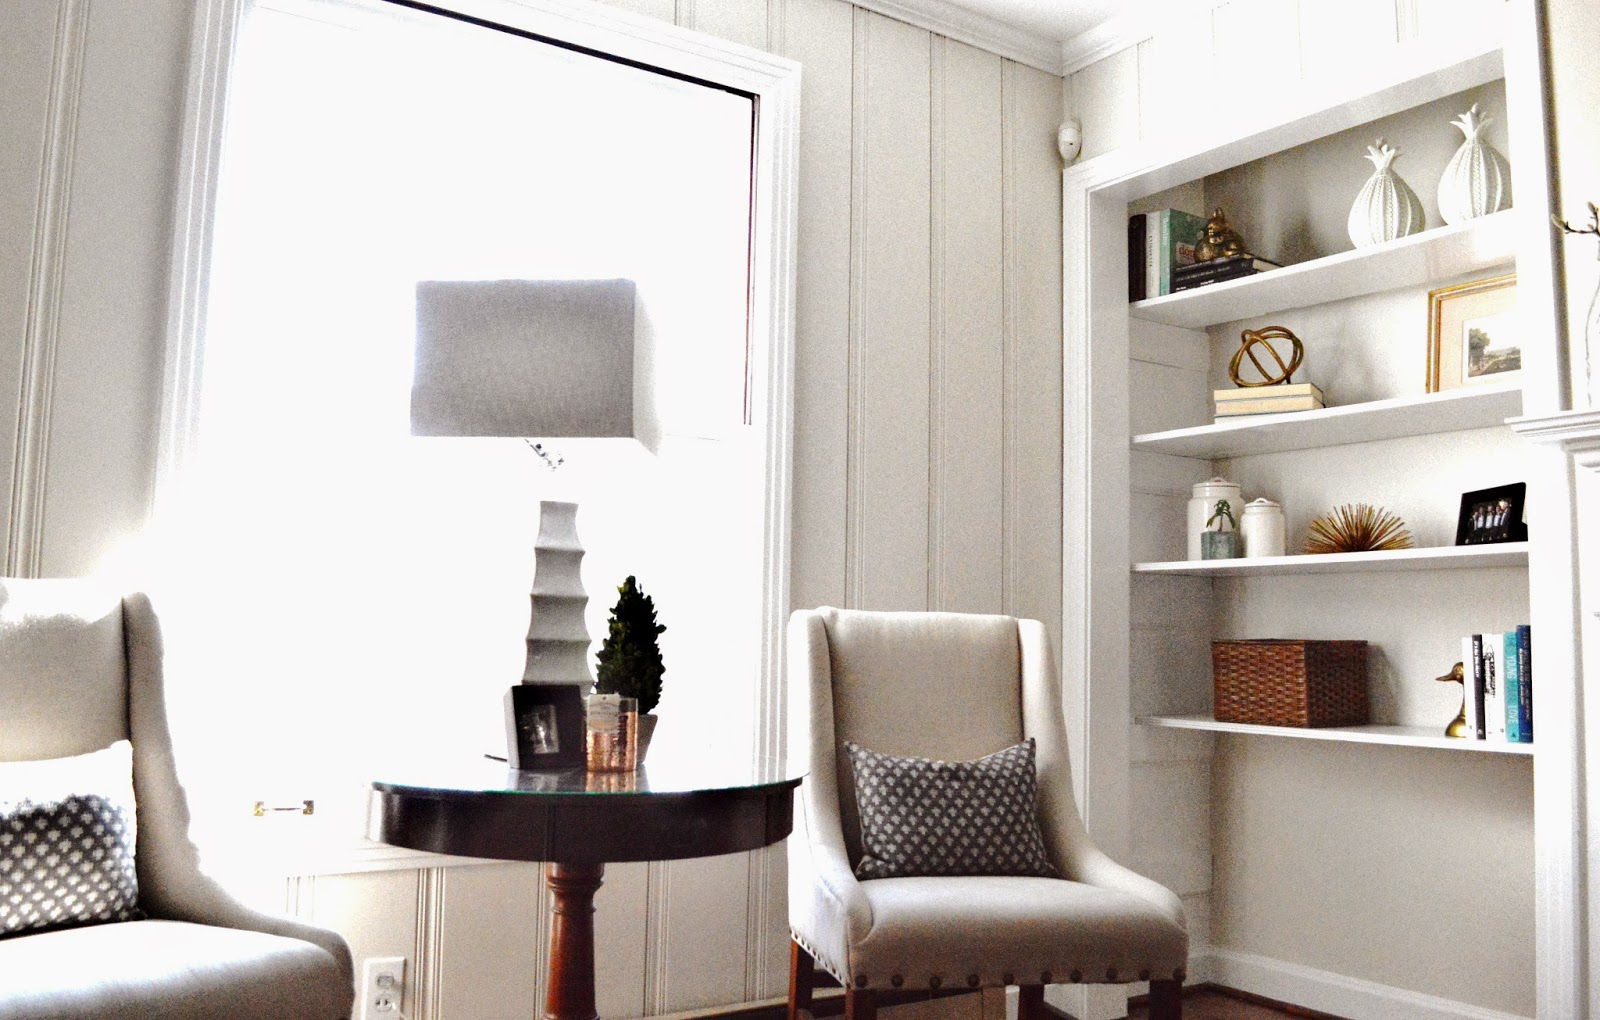
Our past two places (one & two) have not had any built ins, so when we stumbled upon our new home and it had a small little nook with shelves I was so excited. (Almost) Built ins at last! The green paint and tattered shelving were a lot to see through, but I knew the shelves had potential.


Here are my tips & trips for gorgeous bookshelf styling: 
  1. A crisp glossy trim and the right color paint.  
  2. Less is More. Clear off your shelves first, and start from scratch. Display only items you love. 
  3. Vary your objects. A great mix of objects and books is essential. 
  4. Add framed photos and art.
  5. Use baskets to hide clutter.
  6. Mix up your books. Vertical & Horizontal or Both!
  7. Inject odd-ball objects for contrast.
  8. Add Something green. 


Happy Styling!


Monday, December 15, 2014

How to Make Old Grout Look New

Brown Bear Grout, Brown Grout What do you See? I see ugly brown grout looking at me. So was the story of our second bathroom.. until the other day!


If you remember from our house tour, this is what the bathroom looked like before we moved in, ugly brown grout and all.


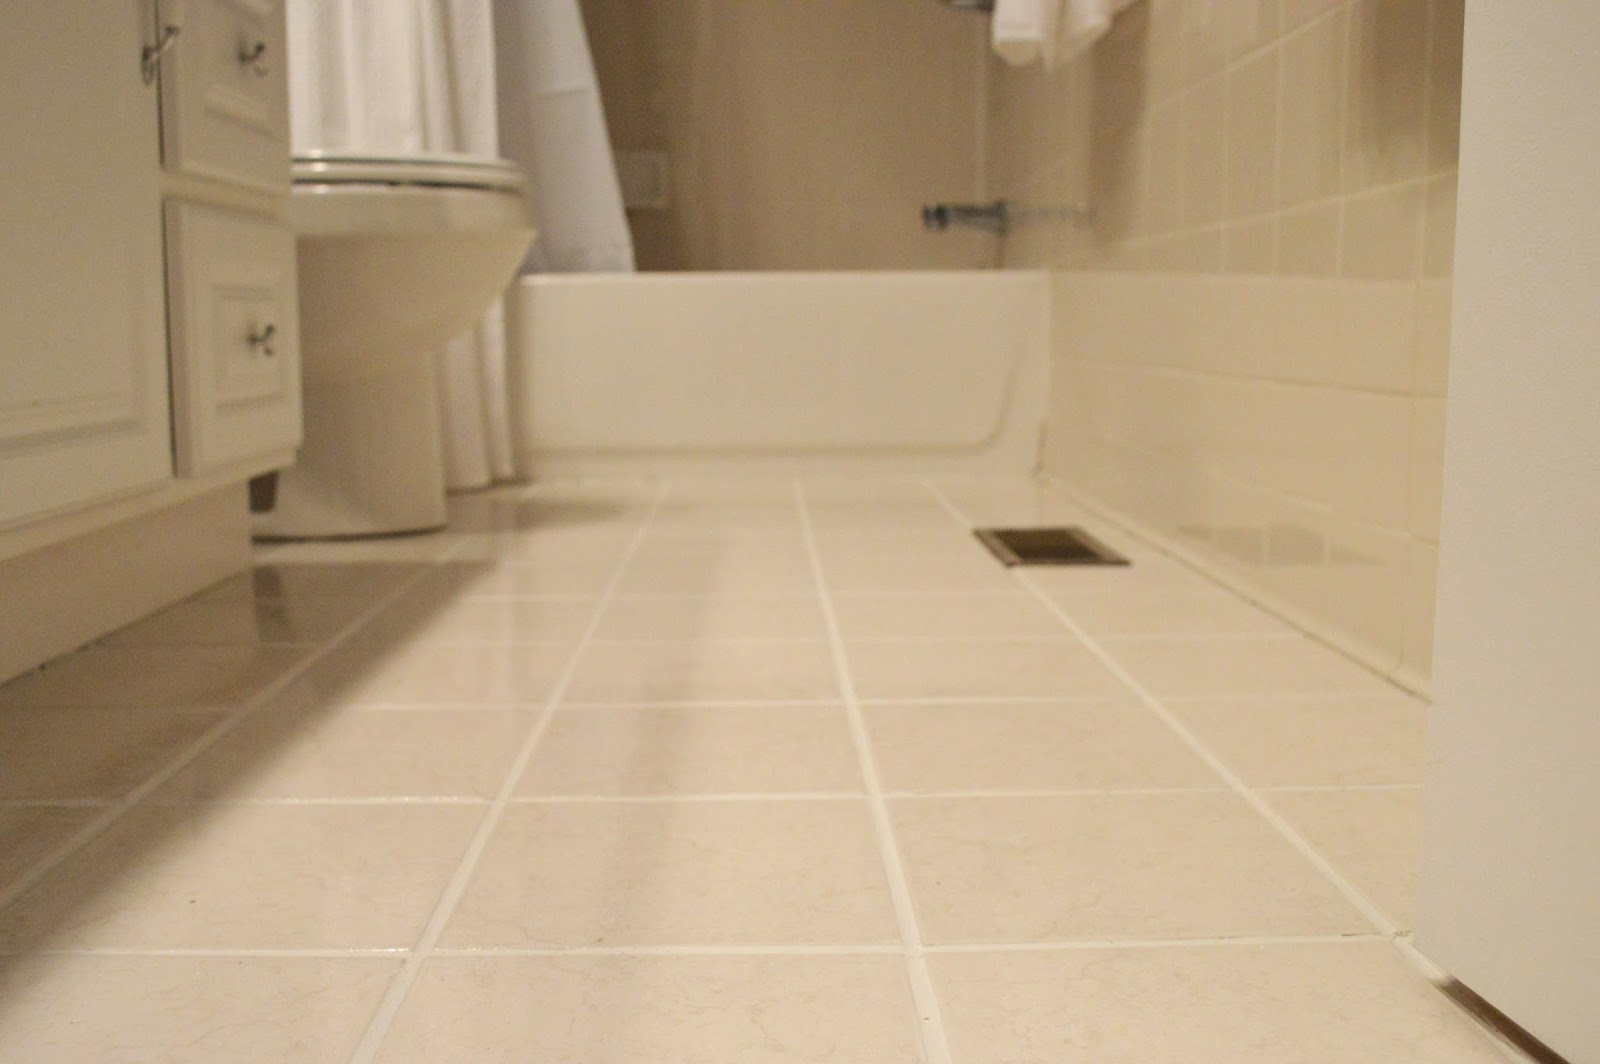
And this is what it looks like after a coat of Tricorn Black paint. I love the color, but it made the brown grout all that more apparent. In our last house, we did some heavy grout cleaning and painting, as well as cosmetic update to our small bath. Although we are not fighting with retro blue tile like in our last home, the brown grout was something that automatically dated the bathroom. I knew retiling wasn't an option (especially, after that time we tiled the kitchen) and we are not ready to gut the entire bathroom, so I began the search for an easy solution.

BEFORE

I found out that YHL had a similar grout dilemma in their new house. So I read about their experience and headed to Lowes to purchase both a grout pen and grout renew paint/sealer to try. Like YHL says, the grout paint/sealer works best. I thought this would be an incredibly meticulous task - I started out painting each grout line super carefully, trying not to get any on the tile. I was very untrusting of its ability to come off the tile so in the beginning, I was diligently wiping any spots off of the tile as I went (even though the grout renew bottle says to wait 30-45 minutes, spritz with water and then wipe off the tile). It was slow going! I started in the most conspicuous area - beside the toilet - to perfect my skills and then tested this "30-45 minutes theory." Low and behold - it worked! 


I had to do three coats of the grout renew to cover the brown. I suspect if I was using a color closer to the underlying grout that two coats would have been enough. You can see that I was not very meticulous after I tested the spot behind the toilet. I would put on one coat, wait 15 minutes, put on the second coat and then wait 45 minutes before scrubbing the excess off of the tile. For the third coat, I would be more careful and wipe the tile clean as I went (because it was such a light third coat, mostly touch ups, I felt like this was more efficient than waiting another 30 - 45 minutes).


Another thing that worked well was dividing the room into sections. This is a small bathroom, but I still had 4 rounds of waiting for the grout renew to dry before moving on to the next section. Each section was small enough for me to reach entirely across without resting on the newly painted tile so that I wouldn't smudge a drying section. 


I LOVE the results, and am so amazed that a $6 bottle of grout renew could totally transform my bathroom...but it did!! 

BEFORE

AFTER


Have you guys done any fun big bang for your buck projects over the Christmas break?


Thursday, December 11, 2014

Guest Room Essentials


On Monday, I showed you our new guest room while simultaneously feeling convicted over the need to rest in this Advent season. I hope you too have found a moment between then and now to sit at the feet of the Lord and take in the blessing of this season. As I seek out daily time to rest before the Lord, I feel that is essential that our guests have the same opportunity in the comfort of a cozy guest space while they are visiting. In honor of filling our homes with family and friends this holiday season, I have come up with a guest room essentials list - guaranteed to give your guests a restful stay.

1. Comfy High-Thread Count Bedding
Invest in good bedding for your guests. They will truly appreciate sliding into high thread count sheets and a cozy down comforter. 

2. Access to Extra Blankets & Pillows
Everyone has different preferences in regards to warmth and pillow fluff. Give them options if you are able. 

3. Lighting
Bedside lamps provide added convenience for your guests.You may also want to provide a stack of magazines for leisure reading, a phone charger, and/or clock.

4. Room for their things
Clear out hanging space for your guests, stocked with lots of hangers. Reserve a few drawers for your longer-staying guests so they can unpack and feel at home.

5. Peace & Quiet
Secure pets. Try to stay quiet as you go about your morning routine, and keep TV volumes low to ensure a restful nights sleep.

What do you like to do to pamper your guests?

View our Guest Rooms below:


Monday, December 8, 2014

A Look at Our Guest Room Progress


Transitioning to a new home leads to lots of to dos (you can see the whole slew of them here), but in this season of Advent my heart is convicted that maybe "getting it all done" isn't all its cracked up to be. As I created a place to rest for my guests yesterday, I felt the Lord tugging at my own heart and asking "where is your place of rest this season?" I confess that I have been more of a Martha - trying to get it all done, than a Mary - sitting at the feet of the Lord. (If you are unfamiliar, here is the story of Mary and Martha). He too wants me to rest before Him, especially in this time before Christmas.


I am grateful for the opportunity to create a space where others can come and rest in this season before Christmas. This room transition was simple since we were able to remix some of the same elements from our old bedroom to create a lovely place for our guests. If you remember, this is what the guest room looked like before we moved in:


PROGRESS: 


 My prayer is that each of us would find a moment to rest in this wondrous season before Christmas. I hope you enjoyed this place of rest I created yesterday for my guests, and will feel freedom to put down your to do list and sit at the feet of the Lord today.


You can view the source list for our Master Bedroom in our home by the creek here.


Related Posts Plugin for WordPress, Blogger...

Blog Archive