Showing posts with label HowTo. Show all posts

Monday, March 2, 2015

How To Prime & Paint Solid Wood Doors {and a FREE Printable!!}


Don't forget to look for the free HOW TO Printable at the end!

When we made our big to do list, we talked about adding doors to our Master Bedroom. (Yes, we bought a house without doors to our bedroom). I laugh because it has been 3 months and Ty and I have gotten use to having entire conversations from the living room to our bedroom with no problem. We are excited to have some privacy when guests come, and to stop tip toeing around in the morning when one of us gets up before the other. Because of the archway, these doors needed to be custom so we contacted a contractor in our area and had him come out to measure and create a template for the doors. 6 weeks later they arrived at our home to be installed. Our next step is to paint the doors. We did a similar door painting project on an exterior door in our last house, but this one is much easier since we have a fresh slab of wood rather than a door caked in years of paint. Here is how we painted our solid wood doors (and how you can do it too!).

How To Paint Solid Wood Doors

1// Remove door from frame. Remove all door hardware including hinges. This will give you a clear surface to paint and keep your hardware paint-free!

2// Lay your doors flat! This is key in avoiding drip marks during the painting process and while the doors dry.


3// Gather your supplies. We found that a foam roller brush gives the smoothest finish on doors and cabinets.You will also need a primer made for bare wood if your doors did not come primed. We chose Valspar bare wood. You will also need a foam sander block. This is essential for sanding between coats of primer. Depending on the finish of your doors you will need fine or a moderate grit sanding block. We bought both just in case. These are great for other sanding projects around the house too. Lastly, you will need a tack cloth to clean off the sanding debris, and your choice of paint for the door


4// Time to prime. Our doors were sanded well and smooth from the beginning so we did not sand prior to our first coat of primer. If your doors are uneven or have layers of paint, you will want to thoroughly sand them prior to priming. Using our foam roller we applied one coat of primer to each door and allowed it to dry for 2 hours  per the directions on the primer can.


5// Now that the primer is dried, its time to sand. We lightly sanded each door until the surface was smooth. Using a tack cloth, we then wiped the door of all sanding debris. This part is essential to keeping debris out of your paint and off of your roller.

6// (Optional) Depending on how well your primer went on and how porous your wood surface is, you may or may not want to coat with a second layer of primer. If so, repeat steps #4 & #5. We opted to move forward with painting at this point rather than a second coat of primer.

7// With the surface clean and dry, its time to paint. We really like Sherwin Williams ProClassic paint for trim and doors in our last house, so we went with it again. We also chose a semi-gloss finish in a custom white for the door. Using our foam rollers again, we rolled one coat of paint on to the door surface and allowed it to dry for 45 minutes.

8// Repeat step #7 until you have achieved an even coat throughout. We did three coats of paint total.

9// Once paint is completely dry, flip the doors and repeat steps 4-8.

10// Rehang newly painted doors. Replace hardware and hinges. Enjoy your newly painted wood doors!  (Before & After of our newly finished doors coming soon!)

Enjoy this FREE Printable:


Thursday, January 29, 2015

Turning a Mirror into a Headboard


The office has been more of a storage room for the first couple of months in our new home. With the change in my job hours to nightshift, we bumped this room up on the list of to dos. This room will now serve the dual purpose of office & nightshift sleeping room. I am excited to have a cozy little nook to doze in during the day.


The walls are now painted a neutral grey rather than bright green. Last weekend we added roll down blackout shades and a light fixture that actually works. We finally sifted through and sold most of our excess furniture via Craigslist. And this weekend we readied the bed for all of my daytime sleeping by turning a mirror into a headboard (oh, and Ty's deer also found his place).


In our first house, this mirror was the perfect addition to our hallway. During Christmastime, we even used it to display all of our Christmas cards. In the second house, it was a great floor length mirror in our guest room. And in this house we are re-purposing it for a headboard.


The mirror already had the proper brackets in place which made this project super easy. I tied picture wire to the the brackets and it was ready to mount (the twine is just leftover from the card project!)


Then I placed the mirror behind the pillows to determine the correct height. I wanted the wood frame to sit above the pillows while the pillows covered the mirrored portion. Admittedly, I nailed three holes in the wall before I got the height just right. Maybe next time I will use a tape measure instead of eye balling it (duh!)


I love how it turned out. The room is small and so finding a way to have a headboard without making the bed stick out further into the room was essential. I love the contrast of the wood and the walls and the pillows. I also really like that this project was free and made use of a mirror that we really like but couldn't seem to find a place for.


This nightshift haven is coming together slowly but surely. We still need to install curtains, find a proper desk, mount the TV, and find some storage solutions for our office supplies. More to come in the next few weeks. 

Have you guys re-purposed any home items lately? What did you do?


Monday, January 19, 2015

How to Insert a Duvet the Easy Way


Ever try to put a stuff comforter inside a duvet cover and end up sweating and frustrated with a lumpy bed cover to boot? Well, I have and I dread washing my duvet for this reason. I recently saw this video posted on facebook where they teach you how to put a comforter into a duvet cover the "easy" way using this burrito method. Here is the original how to video as featured on the Meredith Vieira Show.


I just had to try it out for myself. My video is actually my fourth attempt to roll the duvet cover out correctly. I still will say that it came out better than the "stuffing it" method but it did take me a few attempts to figure things out. 


Here are a few tips to help you insert your comforter into your duvet perfectly the first time:
  1. Roll from the top towards the opening of the duvet cover.
  2. Tie or pin all four corners of the duvet to the comforter.
  3. The tighter you make your roll the easier it is to stuff it at the end. 
  4. Watch the final step before the roll out carefully. I ended up with a literal burrito several times with no way to unroll the duvet (although this did make for a good laugh!)
  5. The roll out isn't as glamorous as it looks on her video but don't fear, a few shakes of your duvet and it will look gorgeous.
  6. Use two people if you can. It will go quicker and the roll will be tighter(see 3)


What do you think of this method to insert a comforter into a duvet cover?

Monday, January 12, 2015

10 things I learned on my Trip to IKEA.


  1. Make a list, Check it twice. Once you enter the madness of the Ikea store, your brain goes into stimulation overload and everything you thought you knew you wanted is usurped by everything you think you need now that you are in the store. Creating a list keeps you focused. Their website also has a great link for creating shopping lists.
  2. Go with one objective. When we went to Ikea, I had half-way planned out our office and so in the midst of searching for stuff for our Master Bedroom, which I had truly nailed down, I was distracted and constantly saying "well that could go in the office" or "we could do this." There are so many options once you are in the store, so I quickly felt overwhelmed when I was trying to decorate the office without true plans and a clear objective. After realizing that, we went back to our list (see #1) and focused solely on the Master Bedroom which I had completely planned for. 
  3. Hydrate.
  4. Expect a crowd. Wading through the masses is just part of the Ikea experience. Our second trip to Ikea was much more enjoyable because we knew what to expect.
  5. Research before you go. There are lots of parts and pieces to achieve a higher end look of Ikea furniture. If you are looking at an Ikea hack, make sure you research all the parts and pieces necessary to get that look and add it to your list. Here are some of my favorite IKEA hacks here and here.
  6. Bring a tape measure. I say this all this time but if you are buying a sofa, rug, window treatment, etc measure the area in your home before you go, write those numbers down, and bring those measurements with you. Make sure you know exactly what you need. In such a large store, stuff looks bigger/smaller than it actually is. Once you are in the store, check the measurements against those of your home. 
  7. Make a day of it. The store is huge and you will definitely want time to think through your purchases, and find all the parts and pieces you need to create the look you want. This is not a get in and get out type of store (ladies, prepare your husbands appropriately)
  8. Check sizes. I got ALL the way to the register to find that I had two different length curtains in my bag. Needless to stay I had to make my way back through the Ikea maze again to get the correct size. 
  9. Become an Ikea Family member. Its totally free, there is a kiosk in the front where you can sign up, and you save money on select items throughout the store. For instance, we found a large floor mirror that was $20 cheaper with the Ikea Family discount right when we walked in the store. 
  10. Have fun!!

Nashville Friends,
BEST NEWS EVER: Memphis is getting an IKEA
YAY! YAY! YAY!

Monday, January 5, 2015

Gallery Wall Love


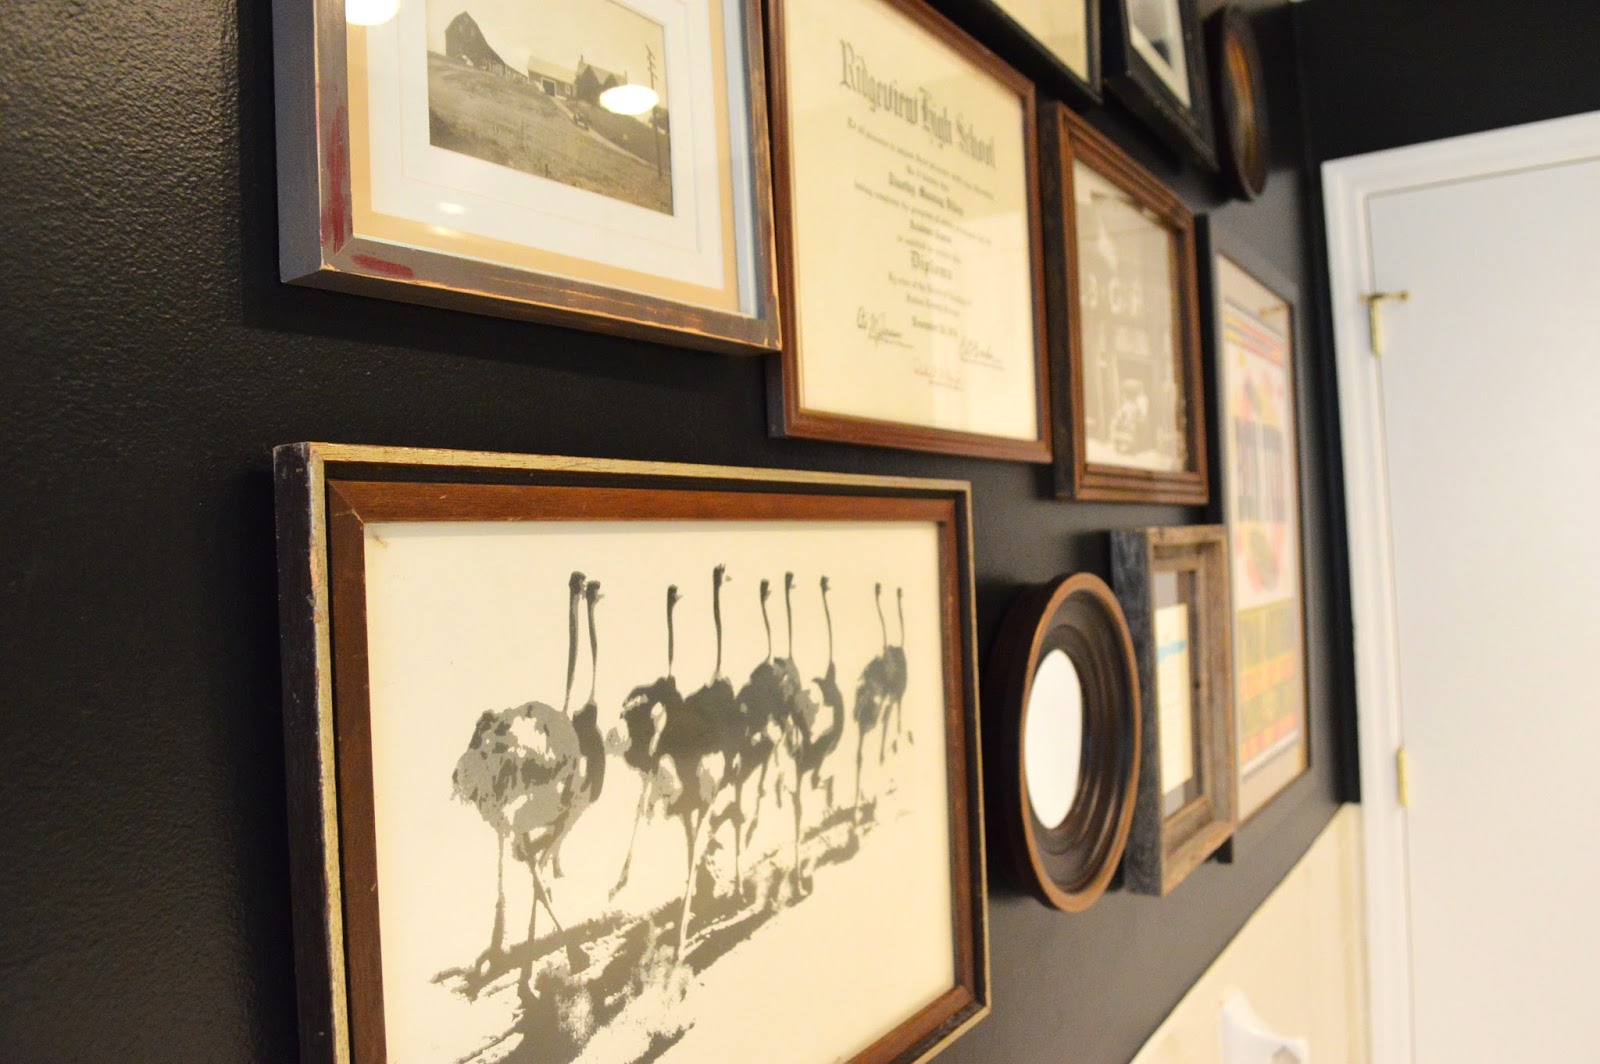
I love a good gallery wall. I think they are eye-catching, warm and they just about make me swoon. I love how no two gallery walls are alike, and somehow even the order of the pictures says something about the person who lives in the home they dwell. The great thing about a gallery wall is that it is created over time. You don't have to have a ton of frames to start, and if the space allows, you can continually add to your collection - an ever growing art piece.


We have a collection of frames we melded together in our last house and I have been dying to hang them in our new house. I love reworking old things to fit into a new space. Originally, I had thought of designing a gallery wall around a TV, but as I stared at the blank black canvas of our guest bathroom, I just couldn't resist. Here is how we created an eye catching gallery wall in our guest bathroom (swoon.)


So where do you start? I asked a gal at West Elm who styles the store how she created their amazing gallery walls. Her take: Pick the biggest piece of art and hang it. Grow everything around that one piece. She doesn't measure, she just feels out the wall, the look and the space. And the results are amazing. I think this is great advice for you free-spirited individuals but for my type A self, this was a recipe for disaster (or at least a lot of extra holes in the wall). I compromised with kraft paper and some painter's tape.  


I traced each piece of art on the kraft paper and then cut out the tracing. I also penciled in which piece of art was which on the paper because many of the frames were similar sizes. Then, using painter's tape so that I wouldn't damage the fresh paint (FYI this black paint is SW's Tricorn Black and it is uh-mazing) I placed the largest art first and started placing and rearranging each piece of art until I found the perfect spot for each one. BOOM! Gallery wall magic.


The kraft paper also makes the hanging portion a breeze. Just measure the location of the hanging device on your picture frame and mark it on the kraft paper. Nail through that spot on the kraft paper and then tear the paper off the wall from around the nail. Fool Proof Gallery Wall Hanging in Minutes!


I love how the gallery wall turned out. It has been a great addition to turning the brown grout white and painting the walls black. I keep wandering back to the bathroom just to stare at it. This bathroom has come a long way and I am so amazed by the impact this easy-peesy gallery wall had on the space. Can you believe this is the same room?


If you are looking for a unique way to display your art collection, this is it! There is no right or wrong way to do a gallery wall - its all up to what you like. Share your gallery wall love in the comments section below!


Monday, December 22, 2014

Tricks to Picking the Right Paint

Last time we talked paint, it was about the paint colors in our last house. In this house, the painting was a little more urgent as the current wall colors are a bit unsettling. One of my main goals in this house is to create flow by using paint colors that all mix and mesh well together. The other challenge is picking the perfect white! Believe it or not, not all whites are created equal. Every white has some sort of color undertone, and each one looks different depending on lighting (especially when candy apple green threatens every wall!) So in honor of picking paint for our new house, I want to give you my best tips on picking the right paint.


1. Buy paint samples. Don't rely on computer images or the tiny square paint chips you can get for free at the paint store. Spend the $5-$7 it costs to purchase the samples and save yourself some angst! (Another hint: I usually wait for a 30% or 40% off sale at Sherwin and then buy all of my samples at once.) 

2. Paint LARGE splotches on the walls in several areas of the room with your paint samples and stare at them for days. Every color will change throughout the day and will look different in different areas of the room. Make sure you like the paint color in every setting.

3. Create flow with your paint colors by picking paints that mesh well together. There are several ways to do this. One way is to stay within your paint card. Another is to stay within the cool color family or the warm color family. 


4. Be aware of color undertones. As I mentioned before, all whites have some sort of color undertone but so do colored paints. For example, Anonymous by Sherwin Williams has a green undertone in the right light, although it appears to be a very greige (brown -grey) color at first glance. If you have a hard time seeing undertones, look at the darkest color on the paint strip. When in doubt, ask a friend. Grays are the worst, in my opinion, for changing colors. Remember, my struggle to pick a gray in our last house. Most of them looked pink or purple when I got them on the wall, except for one: Mindful Grey. 

5. Don't be afraid to be bold. I often find myself picking a color I like and then being scared to go "that dark" or "that light." What ends up happening is a I pick a shade darker or lighter and its the wrong color - totally washing out the space. Be bold. Pick the color you like and go with it.


Still don't know where to start? Look at what you have pinned on Pinterest and write down what you like about each room. Is it the wall color or the sofa? Once you have done this with ten to fifteen rooms, you will most likely see a color trend and you can start picking paint from there. Just remember, don't rely on computer generated images for your paint colors - It will look different in your home!

Happy Painting!


Monday, December 15, 2014

How to Make Old Grout Look New

Brown Bear Grout, Brown Grout What do you See? I see ugly brown grout looking at me. So was the story of our second bathroom.. until the other day!


If you remember from our house tour, this is what the bathroom looked like before we moved in, ugly brown grout and all.


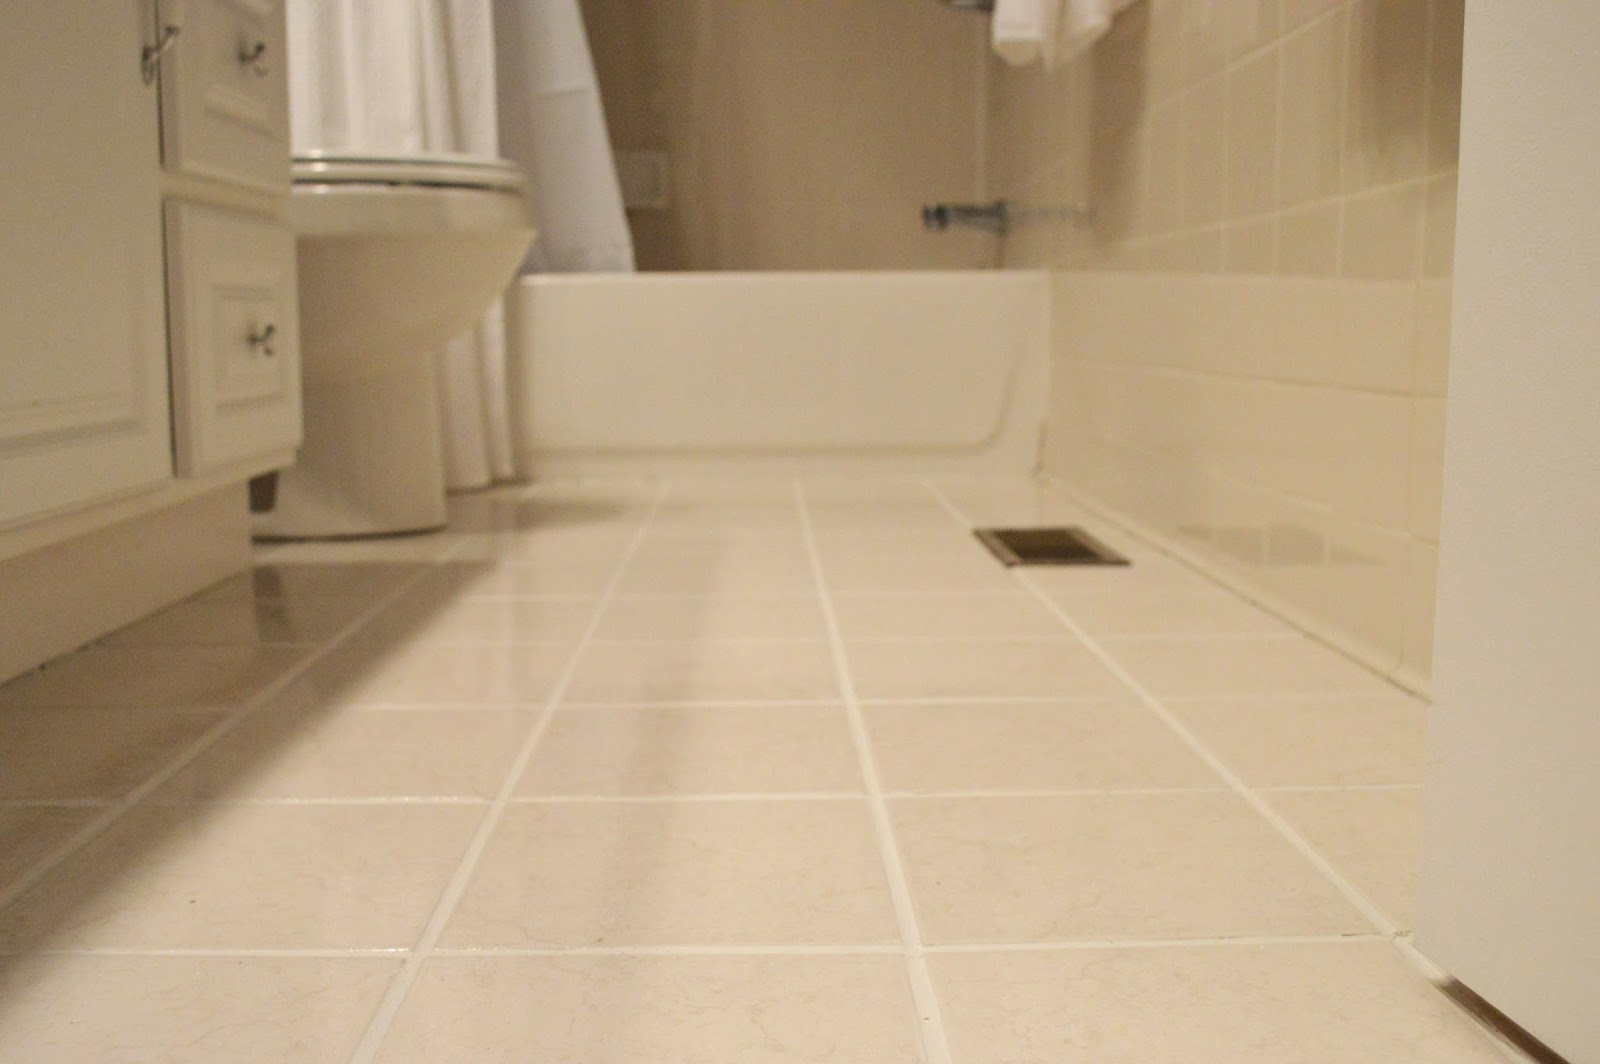
And this is what it looks like after a coat of Tricorn Black paint. I love the color, but it made the brown grout all that more apparent. In our last house, we did some heavy grout cleaning and painting, as well as cosmetic update to our small bath. Although we are not fighting with retro blue tile like in our last home, the brown grout was something that automatically dated the bathroom. I knew retiling wasn't an option (especially, after that time we tiled the kitchen) and we are not ready to gut the entire bathroom, so I began the search for an easy solution.

BEFORE

I found out that YHL had a similar grout dilemma in their new house. So I read about their experience and headed to Lowes to purchase both a grout pen and grout renew paint/sealer to try. Like YHL says, the grout paint/sealer works best. I thought this would be an incredibly meticulous task - I started out painting each grout line super carefully, trying not to get any on the tile. I was very untrusting of its ability to come off the tile so in the beginning, I was diligently wiping any spots off of the tile as I went (even though the grout renew bottle says to wait 30-45 minutes, spritz with water and then wipe off the tile). It was slow going! I started in the most conspicuous area - beside the toilet - to perfect my skills and then tested this "30-45 minutes theory." Low and behold - it worked! 


I had to do three coats of the grout renew to cover the brown. I suspect if I was using a color closer to the underlying grout that two coats would have been enough. You can see that I was not very meticulous after I tested the spot behind the toilet. I would put on one coat, wait 15 minutes, put on the second coat and then wait 45 minutes before scrubbing the excess off of the tile. For the third coat, I would be more careful and wipe the tile clean as I went (because it was such a light third coat, mostly touch ups, I felt like this was more efficient than waiting another 30 - 45 minutes).


Another thing that worked well was dividing the room into sections. This is a small bathroom, but I still had 4 rounds of waiting for the grout renew to dry before moving on to the next section. Each section was small enough for me to reach entirely across without resting on the newly painted tile so that I wouldn't smudge a drying section. 


I LOVE the results, and am so amazed that a $6 bottle of grout renew could totally transform my bathroom...but it did!! 

BEFORE

AFTER


Have you guys done any fun big bang for your buck projects over the Christmas break?


Monday, May 26, 2014

Garage Sale 101

Have you ever gone to a garage sale and just struck out? I have! 
Over the last few years, I have really honed my garage sale-ing skills 
so that striking is a rarity.

Here are my fool proof rules for success at any yard sale.

1. Scout
Thursday and Friday afternoons check Craigslist for 
Yard Sales, Estate Sales, Moving Sales, and Garage Sales. 
And look for signage in your area.
Pick several sales in ONE area that you would like to attend. 

Why it works? Driving all over town to various sales takes time and gas money. 
The best goods go first and since you can't be 10 places at once, pick several places that are closer together.

2. Dolla, Dolla Bills
Get Cash the night before. No more and no less than you want to spend.
Get $1s if possible so that you don't have to worry about change.

Why is works? Unless you are at an estate sale, most people do not take checks or cards. You also have more negotiating power when you have exact change in hand (I'll explain below)


3. Get Amped!
You've got to be there early to get the good stuff so I generally swing by my favorite coffee shop
and wake up while perusing the first yard sale.  
Speaking of...
Get there RIGHT when they open. 

Why it works? The good stuff goes first. Earlybirds stress people out. An annoyed seller is less likely to cut you a deal....so be respectful, and don't get there before they advertise the start 


4. Stalk. 
Have a list of items you are looking for. Walk through the yard sale several times. If something catches your eye, look it over and then keep walking (this will help with negotiating later). 


5. Negotiate 
Before you make an offer, decide on the maximum price you are willing to pay (and stick to it!). 
Make an offer. Garage Sales beg for you to negotiate. 


  • Don't hover around the item you REALLY want to purchase. You'll seem desperate. Take a walk through the sale while you think about the purchase.
  • Sometimes having the cash in hand, and literally holding it out while you say "I'll give you $3" is too enticing for the seller to decline, and you will not even have to meet in the middle
  • Remember: the worst that happens is someone tells you no. 
  • If you are purchasing multiple items, try to ask for a single price for the lot. "I'll give you $20 to take all of this off your hands"
  • Be complimentary of the item, the seller's home - whatever you genuinely like - and tell them.
I hope this helps you in your yard sale-ing adventures!
I'd love to see what you find! 
Related Posts Plugin for WordPress, Blogger...

Blog Archive