Showing posts with label To Do Lists. Show all posts

Thursday, November 20, 2014

The MackDaddy List


Front Exterior:
  1. Paint Brick & Trim (We are thinking DOVER WHITE like our last house)
  2. Paint Front Door (Also thinking STRATTON BLUE in a high gloss like our last house)
  3. Remove 2 trees to the right of the house (not shown, but they are dead and in danger of falling on our house or the neighbors)
  4. Freshen up flower beds, mulch & reseed grass
  5. Plant small symmetrical bushes under left two windows
  6. Replace Front Door Lantern (to the left of the front door) 

Front Entry: 
  1. Paint wall parallel and perpendicular to front door an almost black navy (like Naval or Caviar by Sherwin Williams OR a true Matte Black OR Wallpaper in a funky print)
  2. Remove current curtains and hang a new rod high and wide to make the window appear larger
  3. Install chandelier centered on the window (this will eventually be over our dining table)
  4. Install recessed lighting in entry and dining area for additional light
  5. Paint trim a glossy white (I would like to use the same trim color as our kitchen in the home by the creek)
  6. Paint walls in a warm neutral like Accessible Beige by SW


Kitchen: 
  1. Paint walls & trim
  2. Refinish Cabinets & Install New Hardware 
  3. Build in Refrigerator
  4. Build in Microwave with Pantry in the corner to the left of the sink
  5. Replace current countertops with granite or marble 
  6. Upgrade Faucet and Sink
  7. Upgrade Refrigerator 
  8. Replace Dishwasher
  9. Install new Backsplash (currently it is mirrored)
  10. Consider Installing Vent Hood directly over slide in range 
  11. Install proper lighting over sink
  12. Install proper lighting over bar countertop (I am obsessed with Hicks Pendants)
  13. Replace kitchen plant window with slider window and screen


Living Room:
  1. Paint Trim & Bookcase interior
  2. Paint Walls Accessible Beige or other neutral grey/greige color
  3. Install white wood blinds and curtains at the proper height
  4. Refinish exterior of fireplace with marble or tile
  5. Build out current bookcase (current shelves are flimsy and do not fit properly)
  6. Install Semi Flush-mount Light fixtures
  7. Mount TV
  8. Remove Curtains over French Doors


Master Bedroom: 
  1. Install double doors to master & paint
  2. Paint Trim a glossy white 
  3. Paint Ceiling a Matte White
  4. Paint Walls a Greige like BM's Rockport Grey, SW's Mega Greige or SW's Anonymous
  5. Install two matching chandeliers
  6. Install proper curtains for privacy
  7. Remove Large mirror at end of Master Suite
  8. Remove sconces & repair walls behind sconces or move to be on equal sides of bed
  9. Find artwork or mirror to hide electrical box
LONG TERM: Build in single door on the far end of the suite so there are only French Doors along the exterior wall. Move electrical box to a less conspicuous location. 


Master Bathroom: 
1. Paint Walls & Brick one color
2. Remove fold down Iron
3. Paint Trim

LONG TERM: Gut entire area from closet to bathroom and better use space to create a walk-in closet, laundry area, and large shower. 


Bedroom #2: Office
  1. Paint Walls a deep teal like BM's Teal or Galapagos Blue
  2. Remove current window hardware and replace with wood blinds & proper curtains for privacy
  3. Paint trim
  4. Replace light fixture

Bedroom #3: Guest Room
  1. Paint Walls
  2. Replace current blinds with wood blinds & proper curtains for privacy
  3. Paint trim
  4. Replace light fixture

Guest Bathroom: 
  1. Paint walls and trim
  2. Replace with double bowl sink vanity
  3. Remove current mirror and replace with mirror over each sink
  4. Install light fixtures over each mirror & remove current recessed lighting (there are four recessed lights in a row rather than any sort of fixture)
  5. Paint or replace wall & shower tile
  6. Paint floor tile grout a lighter color (currently brown)
  7. Replace shower head 


Back Deck: 
  1. Restain Deck
  2. Power-wash Brick walkway
  3. Drape bulb lights over porch area to improve ambiance
  4. Remove wooden box under plant window
  5. Freshen up flower beds, mulch & reseed grass
  6. Create storage area for outdoor cushions and hot tub supplies
  7. Remove current lawn decor to de-clutter space
  8. Invest in outdoor furniture - We are thinking a nice sectional to tuck in the corner and then a table that seats 12 on the brick walkway outside of the kitchen window. 
We are SO excited to be in this new home before the holidays. Of course, before any of the list can happen we have to pack up our home by the creek, say a tearful goodbye to our first HUGE undertaking in home renovation, and move our stuff just 3 miles down the road to Brookside.

Find our previous honey do lists here and here and here. 
See our home tour of our condo here and our home by the creek here. 

Monday, March 3, 2014

Organizing Gift Wrap in a Small Closet

When a good friend of mine asked me to organize her closet for all of her Freedom's Promise gear, I was so excited. Freedom's Promise is a terrific organization that seeks to prevent human trafficking. I first traveled with Freedom's Healing (a subset of Freedom's Promise) in July 2011 for a medical mission trip to the country of Cambodia. Since then, I have remained connected with the organization and was delighted to use my organizational skills to help the cause. 

Here is the space to be organized:

And here are the boxes of files, office supplies, etc that need to be organized...

There are actually two identical closets in this bedroom which currently house personal items and soon, Freedom's Promise items. We really couldn't just organize the newly designated Freedom's Promise closet, without also organizing the other closet with the displaced personal items. 

Here is the other closet: currently housing gift wrapping supplies, some holiday items, and gifts


After assessing the items in both closets and discussing what my friend wanted from each closet, I came up with a plan for each closet. In the Freedom's Promise closet, we really needed shelving for storage of office supplies, files, folders, and bulk office supply items. 

Freedom's Promise Closet: BEFORE

Freedom's Promise Closet: THE PLAN

PERSONAL CLOSET: BEFORE

The personal closet is also within the guest room, and needs hanging space for guests to use when visiting. It is also a storage spot for extra gifts and gift wrapping supplies, as well as a pack-n-play and small highchair. The plan is to use the vertical space as well as the flat surfaces within the closet to maximize functionality. By using the door for gift wrap organization, similar to this idea, we will free up valuable hanging space. I decided to use large canvas bins for the closet shelves to house sheets and other items guests may need during there stay. For the gifts, I chose decorative baskets that sit on the floor of the closet and are easily accessible. The remaining items tuck nicely in the corner of the closet, out of site but not out of reach.


Up first, enacting my plan to solve the Gift Wrap Dilemma in the Personal Closet. 
If you have a wrapping paper problem (or any other organizing crisis!), I would love to help you solve it!
Contact me at Organizing-Nashville@gmail.com

If you would like more information on Freedom's Promise, 
or if you are interested in donating to support the prevention of human trafficking


Thursday, December 19, 2013

Plans to Update the Retro Bathroom

The most common question after our Kitchen Reveal has been...

WHAT's NEXT??

 Well..... I'll tell ya it does NOT involve TILING...although it DOES involve TILE.
In all seriousness, we plan on enjoying the holidays and hibernating, before gearing up for our next big project. 
We have a lot of small projects and decorating that we want to complete before spring springs!

We DO have big plans for the Spring though: BATHROOMS!

BATHROOM #1: The White Bathroom

This bathroom is small but functional. It is attached to the bedroom/office space off of the kitchen. It has a standing shower, sink and toilet. 


1. Replace shower pan. We will have a proffessional come do this. Ours is at the end of its life and we are looking forward to being able to use this shower once it is in new condition!
2. Install new shower fixtures. 
3. Install Pedastal Sink
4. Paint walls and Trim. I am thinking of going with GAUNTLET GREY (just two shades darker than the Mindful Grey of the attached bedroom). 
5. Replace toilet. It has a padded seat cushion from the 60s (yuck!)
6. Install shelving above toilet. 
7. Install new blinds.
8. Patch hole next to toilet.
9. Refinish tile.
10. Install new light fixture & updated mirrored medicine cabinet. 


Bathroom #2: The Blue Bathroom

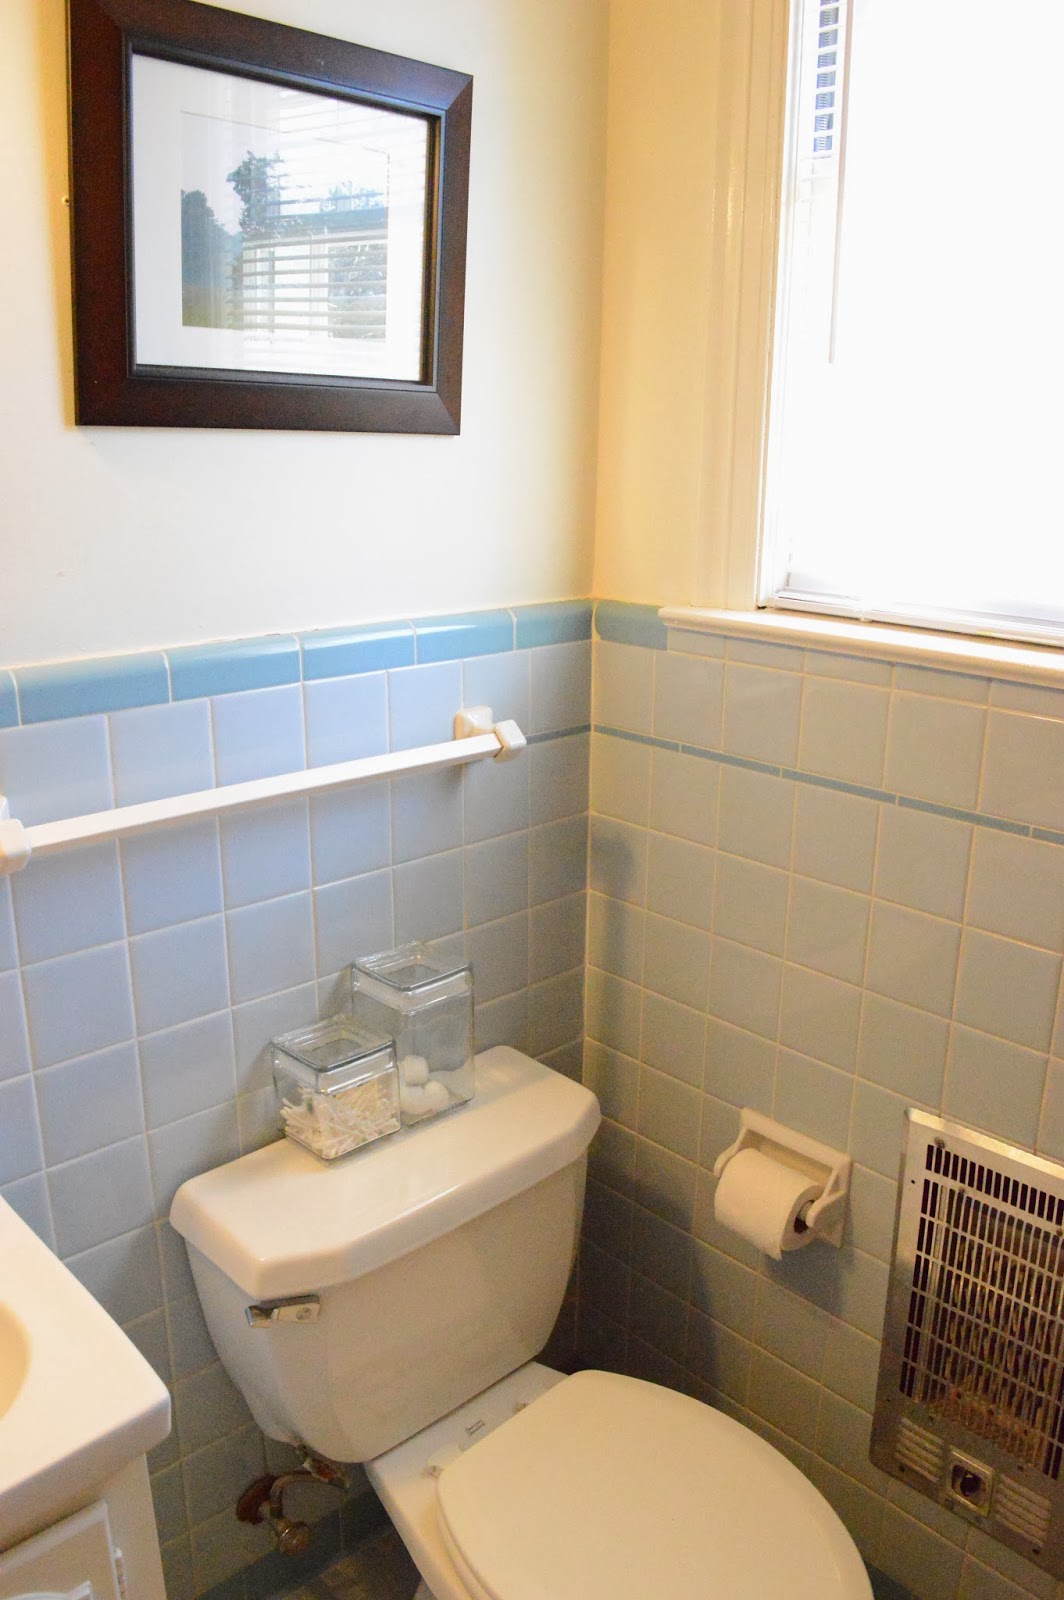
This is our main bathroom. It is has a shower tub combo, linen closet, toilet, and vanity.


1. Paint trim and walls (colors TBD)
2. Install new vanity and fixtures.
3. Replace mirrored medicine cabinet
4. Re-glaze bathtub
5. Install new shower knobs (we have already replaced the shower head)
6. Install new blinds
7. Install a new light fixture & adjustable makeup mirror.
8. Paint linen closet and add organizers.
9. Refinish tile. (we are not sure what all this entails, but we WILL keep you updated!)

So while most of y'all are having visions of sugar plums, we are dreaming up our next big project.
Happy Holidays everyone!

What are you guys dreaming up for the new year? 
We would love to hear about your DIY/renovation/remodel plans for 2014.

We will be featuring YOUR HOME PROJECTS in the New Year. 
Post in the comments below for more information.


Thursday, September 12, 2013

Honey Do UPDATE!

Time for an update...
you remember this enormous list we had in the beginning right? Well, we are two months into living in our new space and we are beginning to chip away (& add to) this list. Come take a look at where we are at.


Let the planning begin!  
I have probably written out a million lists in my head, 
and dozens more on scrap sheets of paper since we first put a bid on the house, 
BUT now  I can officially do one of my favorite things, so here it goes,
a running list of honey-do's for each room of the house (well, part 1 of that long list at least)!


A very good place to start... 
The Entryway!


In the entryway...


Exchange hanging fixture for a flush mount one. The lantern hangs too low and anyone over 5' will hit their head.


Paint walls... Rockport Gray!! 
errr..Mindful Gray. but check!


Paint area under chair rail white to match trim.


Reverse coat closet (behind front door) to be used in Master Suite (more on that later!)
New Plan: Maintain coat closet in the entry!


Living Room:

  • Paint Walls Revere Pewter with a white(ish) trim. 
  • Update Fireplace (aka get rid of the yucky outdated brass) View that here!
  • Add built-ins with a place for the TV


Dining Room:


  • Widen doorway (far back left) to create a more open space between dining room & kitchen We nixed that idea week 2. The doorway is plenty wide and the kitchen feels really open.
  • Update fixture
  • Tear out wallpaper circa 1980 & replace with wainscoting panels
  • Paint Walls & Trim


Here is the look we will be going for in the dining room except we will probably use a round dining table and go a little more casual with the fixture. Oh my, I just can't wait!


Kitchen:


  • Right now there is some crazy wall paper adorning the ceiling -- that's got to go!
  • Replace fan with a flush mount fixture & pendant lights over bar seating
  • Update Replace kitchen cabinets and countertops (after further inspection these need to go!)
  • Paint kitchen trim and walls
  • Pray there is hardwood under the linoleum! Rip up linoleum and refinish hardwoods (lucky us...there ARE hardwoods! YES!!!!!)
  • Refinish/Re-coat old farmhouse sink & replace hardware
  • New plan: Add granite countertops & a smaller undermount sink (current one is 4 ft wide)
  • Demo old cabinets and hang in garage (oh yes, we are BIG fans of the "use what ya got" mentality)


Loving this look for our future kitchen!


Sunroom/Back Entry:
So many windows!

  • Fall in love with wood paneling. Paint said paneling a neutral color.
  • Replace door to garage (one on the right) with a fire-safe door  
  • Update fan with three-light ceiling fan (say goodbye to brass!)


View from the Back door into the sitting area of the "sunroom"


This is where the home remodel gets real! 
We are ditching the old bathrooms,
 and creating a Master Suite for ourselves, 
but to be really impressed you'll need to see what it looks like now.

First up, the all important BLUE hallway bathroom! 

Nothing a little demolition won't take care of!

NEW PLAN!
  • paint existing tile OR demo tile and replace with beadboard
  • if replacing beadboard, retile shower
  • replace tile on bathroom floors
  • install new vanity
  • consider glass for shower door
  • new shower hardware, towel bars, faucet
  • install new light fixture & mirror

Bathroom #2 (& current Master Bath): Built for Tiny Tim


NEW PLAN:
  • learn how to replace a shower pan and retile this shower OR make this into a half bathroom
  • Install pedastal sink to make the room feel bigger
  • repair and refinish tile in necessary areas
  • install new toilet (at a minimum, replace the cushy toilet seat)
  • consider glass for shower door
  • new shower hardware, towel bars, faucet
  • install new light fixture & mirror

The Plan: 
  • Demo BLUE & TINY!
  • expand current white bathroom into a more spacious guest bath, accessible from the hallway
  • create an en suite Master Bathroom with two vanities, and a luxurious shower
OR SCRATCH ALL OF THAT!


Here is some forward thinking...

Future Master Bathroom (minus the tub...it just won't fit!)


Inspiring look for the Guest Bath

Let's wander down the hallway to our sleeping rooms.... 
this hallway will also get doused with Revere Pewter  
& updated with a new fixture


Bedroom #1: 
The Green Room AKA The Back Bedroom 
i.e. Future Master Bathroom

Here is what I am thinking...

To Do:
  • Create a doorway between Master Bedroom & Green Room
  • Turn Half of Green Room into the Master Bathroom by adding drywall, appropriate plumbing, shower, two vanities, and tile
  • Turn other Half of the green room into the third bedroom....the other part of this bedroom will be where the current BLUE bathroom is  
NEW PLAN: This room will either become the Master bedroom with an en suite Master bathroom addition OR we will keep it a lovely guest bedroom/office. Either way...
  • paint walls and trim
  • replace light fixture
  • replace closet doors (if we decide against the bathroom addition)


The FUTURE Master Bedroom (makes me just peach-y!) 


 To Do: This room is our beautiful guest room
  • Reverse Closet: Drywall work & Closet door installation NOPE!
  • New fixture
  • Paint walls & Trim. I am thinking a calming blue/green color like this: I went with SW Sea Salt


Benjamin Moore Palladian Blue


Bedroom #3: Purple Haze


To Do:
  • Paint walls & Trim. 
  • Replace Light Fixture
  • Replace Closet Doors & add shelving inside closet 
  • Drywall space where current entry to TINY bathroom currently is (the new guest bathroom will be accessible from the hallway) NOT PART OF NEW PLAN

We have made it to the end of the honey-do's, and we are finishing strong with some great ideas for the exterior of the house, the yard & the garage space. 

Up first, the facade of our home by the creek:

TO DO:
1. Paint Brick a gorgeous & inviting creamy white with a correlating white trim
2. Paint shutters a deep navy blue

Here is my inspiration & SOON-TO-BE color scheme for the exterior. 
I am always amazed at what a little paint can do...


FRONT PORCH


TO DO:
1. Brighten up front door with Benjamin Moore's Wythe Blue 
2. Remove Storm Door
3. Add lantern-like fixture
4. Paint & Re-seal steps to front door

FRONT PATH (now!)

TO DO: 
Add Blue Slate Pavers....to create a more ordered look like this!


BACK DOOR

TO DO:
1. Remove Storm Door (it is broken) Repaired!
2. Paint back door the same Wythe Blue as the front door
3. Replace/Repair flood light fixture above door (purchased not installed)
4. Repaint & Reseal back steps


On edge about this HEDGE....

There's a creek somewhere behind there....

TO DO: 
1. Go to work with a trimmer and cut back the hedges, 
overgrown weeds and limbs around the bases of trees (basically, Clean it up!)
2. Mulch around the existing flower/tree beds.


WISTERIA HYSTERIA 
All we need to do here, is trim the wisteria back from the roof line and shape up the bottom.... 
more work for the trimmer! (Oh, and that large crumbling cement fireplace has to go as well.)


Herb Garden & Flower Bed
TO DO: 
Demo Flower Bed. 
So sad to have to remove this but it holds water against the side of the house, so we are going to replant the beautiful herbs and roses in an alternate location.


Last but NOT least.....THE GARAGE (exterior)

The Garage (interior)

TO DO:
1. Add electric garage door openers (YES!! Can't wait!)
2. Dismantle loft (it is only held together by 2 - 2x4s hanging from the rafters -- yikes!)
3. Create a laundry room area (unless we follow through with the addtion plan which includes this)
4. Dry wall garage walls and ceiling and remove black tar paper
5. Seal & StainConcrete Floors.... I am thinking something shiny like this...


We are so excited to be in our home at last, and to start ticking away at our honey-do list!

Still have lots to go, and our minds and plans are changing all the time. We are having a blast working on projects together, and brightening up this home! 

Related Posts Plugin for WordPress, Blogger...

Blog Archive