Showing posts with label Room Refresh. Show all posts

Monday, March 17, 2014

Decorating Our Guest Room on A Budget


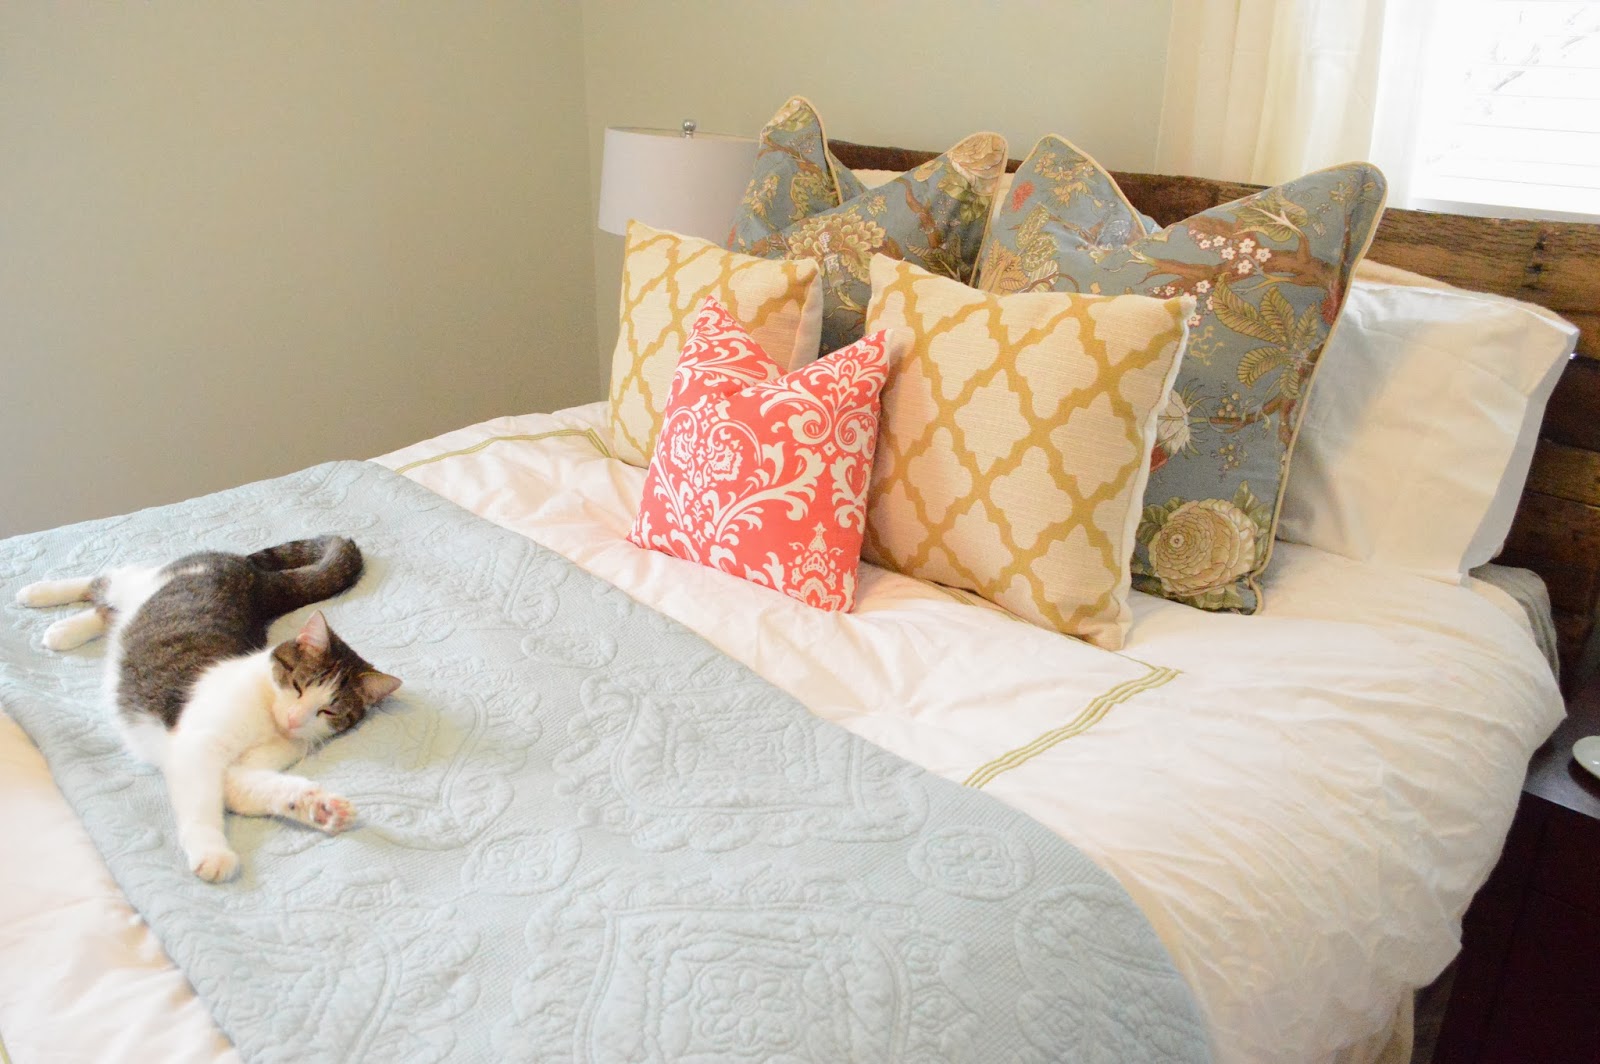
We are enjoying our guest room these days... maybe even a tad envious when we glimpse the guest room and then walk into our unfinished master bedroom... but we are so thankful it is ready to host guests at a moments notice. Here is our Budget Breakdown for the guest room and HOW we got that look!

  • Pallet Headboard: FREE! This was the first project Ty and I did together. Who knew it was foreshadowing many DIY projects to come!
  • Bedding: The White Duvet with the Green trim I bought in college. It can still be found here. The quilt was a steal at TJ Maxx/Home Goods for only $49. It is made my Cynthia Rowley.
  • Pillows: The Euro Shams are from PB's Palampore Bedding Collection. These cost a pretty penny at $49 each, but when debating over making my own shams out of my FIRST CHOICE of fabric... Schumacher's Chaing Mai in Aquamarine at $100plus/yard...these were definitely the cheaper of the two options; Yellow Pillows: Homemade from our previous guest room in the Sloan Road HouseCoral Damask Pillow: This was a GREAT Etsy find. Only $14 on clearance.
  • Matching Glass Lamps: Also on CLEARANCE for $29 each at TJ/HG
Schumacher's Chaing Mai Fabric in Aquamarine
Reading Nook: 

  • Yellow Chair: From my childhood, FREE (thanks Ma!)
  • Tahari Yellow Baskets for Wall Art: $45 from TJ Maxx/Home Goods
  • White Fluffy Pillow: Another TJ Maxx/Home Goods find for $45
  • Curtains: White Ritva Curtains from Ikea (4); two pair for $24.99 each
  • Night stands and side table: all previously owned $0


and last but not least...
Crystal Knobs to update existing side table: $7


Grand TOTAL: $400 on the nose 
(I included tax to get this pretty number) 
We also plan on changing out the light fixture at some point too! 


Share this with others on PINTEREST


Thursday, February 27, 2014

Freshening up a Living Room on a Zero Dollar Budget


After finishing Beth's Kitchen (seen here), she got an itch to makeover the living room as well. We are on a strict "use whatcha got" budget for this room overhaul and that is exactly what we did. Beth has great taste, and has done a beautful job collecting accessories over the last few years. In fact, the only things she has purchased for this room are the TV, the sectional sofa (bought second hand), and a few pillows.Other things she has found, collected, or have been gifted to her from family. Her home is testimony to the fact that you don't have to spend a lot to make a place look great!


Here is a little room tour so you can see the space before.
Fireplace Mantle (BEFORE): 


Area by the Front window (BEFORE)
:

Small Desk/Office Area (BEFORE)


Front Entry (BEFORE)

Area behind sofa: (BEFORE)


 As you can see the living room is very open and spacious, which is both a challenge and a blessing. When you have such a large area, it is important to designate a purpose for each portion of the room so it is functional. That is exactly what we did. While the TV watching "zone" remained in the same portion of the room we relocated the actual location of the TV.

BEFORE: TV on mantle

AFTER: 

We relocated the TV to sit on her grandmother's old cedar chest - something we found stashed away in a spare bedroom. The old suitcase belonged to her aunt and provided just the right amount of extra height we needed for the TV. 


With the TV gone - the mantle was now free to be a focal point from the front door (rather than the TV).

View from the front door (BEFORE):

View from the Front Door (AFTER):


The area next to the front door while large, was not funcitonal. We moved her most comfy reading chair from the TV viewing area to the area by the front window to balance out her other reading chair. We also found a retro lamp in the garage to add light. 

Reading area:  (BEFORE)

Reading area: (AFTER)


We pulled a chair from her bedroom into the living room, and closed the table leaves to warm up the entryway.

BEFORE:

AFTER:


The desk area also got a little sprucing..

BEFORE:

AFTER: 


The final look....
BEFORE: 

AFTER: 


This room is Leland approved!


Share this with your friends on PINTEREST!


Monday, January 13, 2014

Freshening Up a Kitchen on a Zero Dollar Budget

If you don't already know, I am a {home} rehab nut. 
So this Room Refresh series is dedicated to taking my craziness into YOUR home! 
Not only do I love fixing up our humble abode, but I love making all spaces new through decorative organizing and accessorizing.

My First Victim: Beth's Kitchen (BEFORE)

There is no better place to start our Room Refresh series than a best friend's house. Beth and I have not only been friends since 7th grade (yes, that's 16 years for those of you counting!), but we also both live in 50s ranch-style homes. So, when she asked me to come help organize her kitchen, I jumped at the opportunity. We tackled her kitchen today by cleaning out the cabinets, organizing, and accessorizing. Not to mention, we cooked up some pretty scrumptious plans for this kitchen's future.

Beth's Kitchen: View from the Dining Room (BEFORE)

Our goal for the space during our clean-up and clean-out day was to simplify
We wanted to organize the open shelving, clean out the cabinets, and freshen up the counter-top space by making things like the microwave and toaster not so applianc-y. 


Beth's Kitchen: View from the Living Room (BEFORE)


We started out by clearing out the entire space. Yep, we removed everything from every drawer, cabinet, nook & cranny. Beth made this very easy because she was so ready to clean out. 
We quickly divided everything into Give, Trash, and Keep piles before re-organizing everything in the cabinets.

Mid-clean out: The Dining Room became our sorting station

Our main focus for accessorizing was the open cabinetry. 
Beth had already removed the doors on the cabinets which made this part easy and fun!

            Open Cabinetry: BEFORE                                                                       Open Cabinetry: AFTER


Up Close & Personal Look at the AFTER open cabinetry: 


And while we were cleaning out we couldn't help but come up with some ideas for the future of the space.... 
Beth really dislikes the florescent ceiling light (I second this!) so our next step will be to install proper lighting for the space.


Our other ideas include placing a pendant light over the sink, painting the cabinets, and replacing the hardware.
 Eventually, Beth would like to replace appliances and flooring but until then...
if it ain't broke don't fix it!


The final results turned out great!

Beth's Kitchen (BEFORE)

Beth's Kitchen (AFTER)

View from the Dining Room: BEFORE

View from the Dining Room: AFTER

So what exactly did we do? 
  • Cleared the counter-tops of non-everyday items 
  • dressed up the appliances 
  • organized the open cabinets 
  • Gave or Threw away unused or broken or duplicate items
  • removed the dated curtains
  • cleaned out and organized the interior of the cabinets for easier use and grouped like items together
  • put lesser used items in harder to reach places (like extra china sets!)
  • Decoratively displayed everyday items

More AFTER shots:


Related Posts Plugin for WordPress, Blogger...

Blog Archive